Make a SIFT Workstation AMI
These instructions are adapted from the AWS Reference Webpage on importing images.
It is assumed the user has an AWS Account and has installed and configured the AWS CLI.
STEP 1: Make a Working Directory on your Local Computer
Make a directory on your local computer to contain the files created or downloaded for this lab. For example:
C:\workspace
STEP 2: Download the SIFT Workstation OVA
Go to this webpage and download the SIFT Workstation Virtual Appliance (.ova format) and save it in the directory created in Step 1.
Note: You will need to create a login to be able to download the file.
When it is done downloading, proceed with the next step.
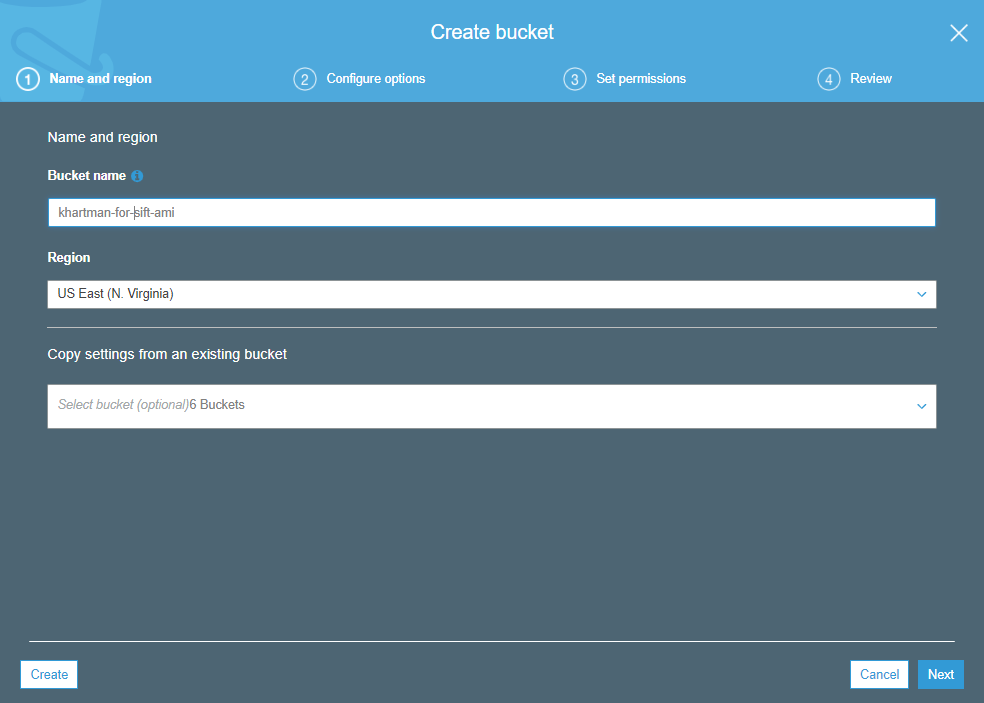
STEP 3: Create an S3 bucket
- Open the Amazon S3 console at https://console.aws.amazon.com/s3/.
- Choose Create Bucket.
- In the Create a Bucket dialog box, do the following:
- For Bucket Name, type a name for your bucket. This name must be unique across all existing bucket names in Amazon S3. In some regions, there might be additional restrictions on bucket names. For more information, see Bucket Restrictions and Limitations in the Amazon Simple Storage Service Developer Guide.
- For Region, select the region that you want for your AMI.
- Choose Create.

STEP 4: Create the Service Role
- Create a file named trust-policy.json with the following policy:
{
   "Version": "2012-10-17",
   "Statement": [
      {
         "Effect": "Allow",
         "Principal": { "Service": "vmie.amazonaws.com" },
         "Action": "sts:AssumeRole",
         "Condition": {
            "StringEquals":{
               "sts:Externalid": "vmimport"
            }
         }
      }
   ]
}
Save the file in the directory created in Step 1.
-
Use the create-role command to create a role named vmimport and give VM Import/Export access to it. Ensure that you run the command in the path location of the trust-policy.json file, and that you prefix “file://”” to it:
aws iam create-role --role-name vmimport --assume-role-policy-document "file://trust-policy.json"Note: If you encounter an error stating that “This policy contains invalid Json,” double-check that the command is run from the same folder where the JSON file is located.
-
Create a file named role-policy.json with the following policy, where disk-image-file-bucket is the bucket where the disk images are stored:
{
   "Version":"2012-10-17",
   "Statement":[
      {
         "Effect": "Allow",
         "Action": [
            "s3:GetBucketLocation",
            "s3:GetObject",
            "s3:ListBucket"
         ],
         "Resource": [
            "arn:aws:s3:::disk-image-file-bucket",
            "arn:aws:s3:::disk-image-file-bucket/*"
         ]
      },
      {
         "Effect": "Allow",
         "Action": [
            "ec2:ModifySnapshotAttribute",
            "ec2:CopySnapshot",
            "ec2:RegisterImage",
            "ec2:Describe*"
         ],
         "Resource": "*"
      }
   ]
}
Be sure to save the file in the folder created in Step 1.
-
Use the following put-role-policy command to attach the policy to the role created above. Ensure that you run the command in the path location of the role-policy.json file.
aws iam put-role-policy --role-name vmimport --policy-name vmimport --policy-document "file://role-policy.json" -
Visually confirm the vmimport role has been made as expected via the IAM Console.
For more information about IAM roles, see IAM Roles in the IAM User Guide.
STEP 5: Upload the Image to Amazon S3
Once the SIFT Workstation OVA Image has downloaded to your local system, upload the OVA file to your Amazon S3 bucket. Because it is a large file, it may be best to use the AWS CLI, as follows:
```
aws s3 cp SIFT-Workstation.ova s3://disk-image-file-bucket/
```
Be sure to substitute for the name of the bucket created in Step 2, above. Also ensure that this command is run from the working directory created in Step 1.
It may take a while to upload the file.
STEP 6: Make the AMI
-
Make a containers.json file and save it in the working directory. The contents of the file should be as follows:
[
  {
    "Description": "SIFT Workstation OVA",
    "Format": "ova",
    "UserBucket": {
        "S3Bucket": "disk-image-file-bucket",
        "S3Key": "SIFT-Workstation.ova"
    }
  }
]
Be sure to substitute disk-image-file-bucket for the name of the bucket created in Step 2, above.
-
Make the image by running the following command from within the working directory, where the containers.json file is located:
aws ec2 import-image --description "SIFT Workstation OVA - $(date)" --disk-containers file://containers.json
That’s it
Eventually the image and snapshots created by this import process will show in your account.
I prefer to make a new AMI based on the Snapshot and add in the Name, Description, and Tags as desired. Then I delete the AMI made during the import.