EC2 DFIR Workshop
Lab 4: Acquiring an EBS Volume
GOAL:
Provision a SIFT Workstation with updated tools to be able to analyze evidence from a compromised EC2 Workstation.
SUMMARY OF STEPS:
- Make a Snapshot of Target EBS Volume
- Make a Volume out of the Snapshot
- Attach New Volume
- Mount New Volume
Step 1: Make a Snapshot of Target EBS Volume
Step 1a: Click “Volumes.”
Step 1b: Select “Create Snapshot” from the Actions Dropdown List.
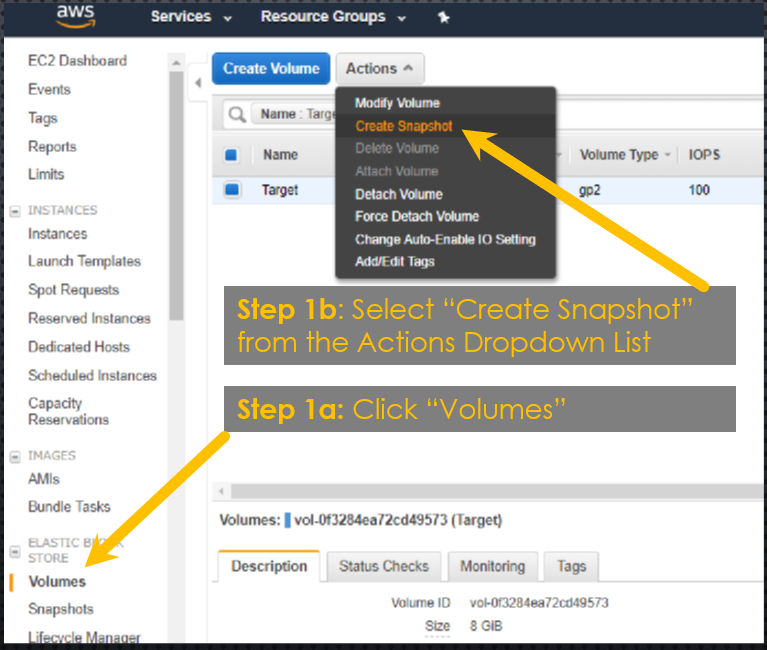 IMAGE 7: Making a Snapshot of the Target Volume
NOTE: If you skipped Lab 1, then use public snapshot snap-05f0794291c491687
VIDEO: Lab 4 Step 1 - Make a Snapshot of Target EBS Volume
Step 2: Make a Volume out of the Snapshot
Step 2a: Navigate to the Snapshot page in the left-hand menu and select “Create Volume” from the Action dropdown list.
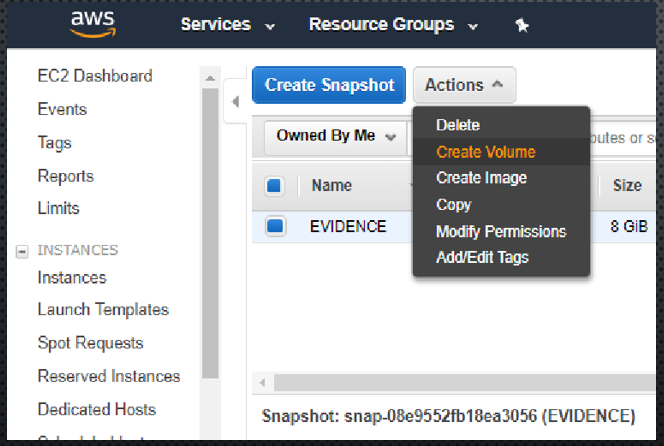 IMAGE 8: Selecting “Create Volume”
Step 2b: Make sure to select the same availability zone as the SIFT Workstation.
Step 2c: Add Tags as Appropriate. At a minimum set the “Name” tag to “EVIDENCE”
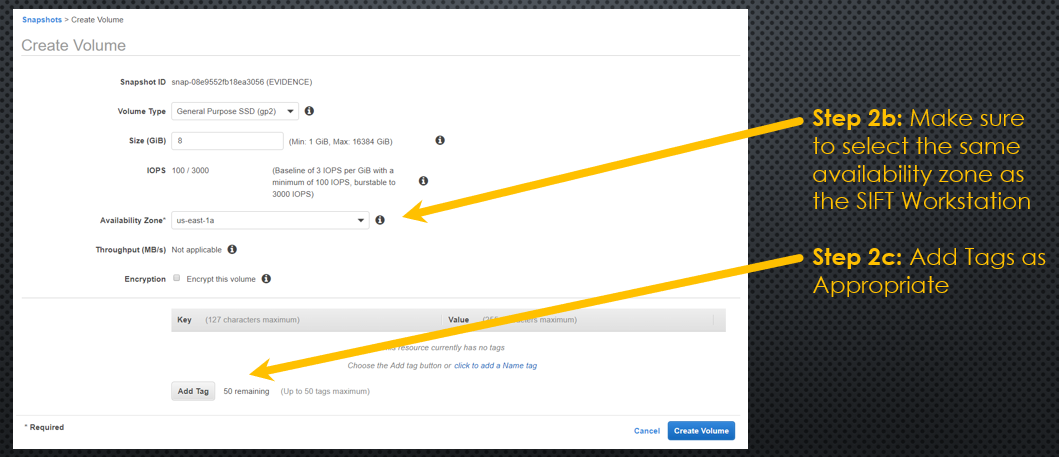 IMAGE 9: Setting the AZ and Tags
VIDEO: Lab 4 Step 2 - Make a Volume out of the Snapshot
Step 3: Attach New Volume
Step 3a: Navigate to the Volumes page and select “Attach Volume” from the Actions dropdown list.
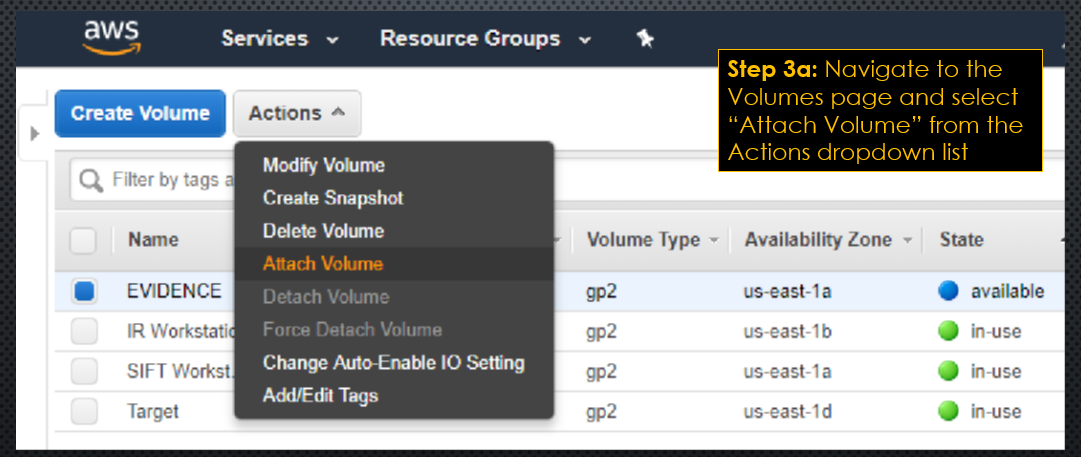 IMAGE 10: Selecting the “Attach Volume” menu item
Step 3b: Select the SIFT Workstation in the Instance list and click “Attach.”
NOTE: The volume must be in the same availability zone as the SIFT Workstation.
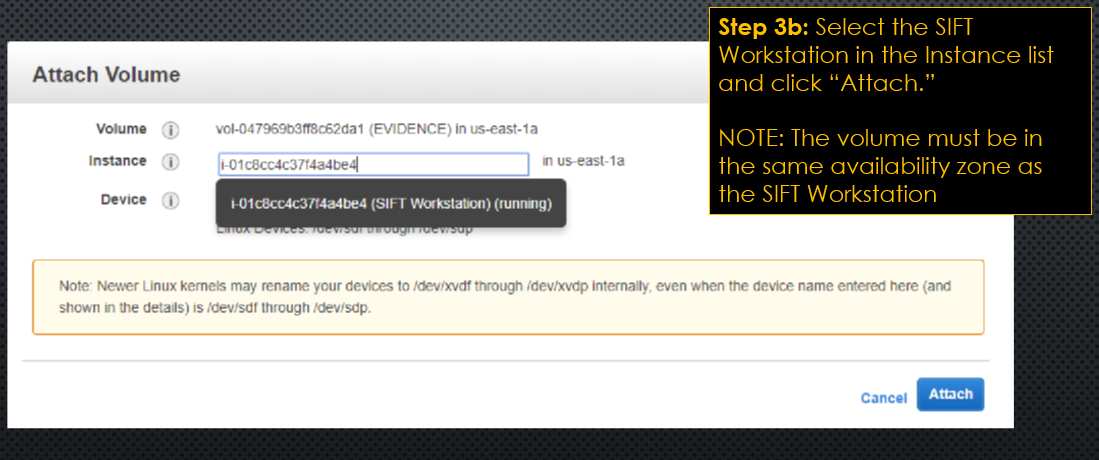 IMAGE 11: Selecting the SIFT Workstation to attach volume
VIDEO: Lab 4 Step 3 - Attach New Volume
Step 4: Mount New Volume
SSH into the SIFT Workstation and run the following commands:
sudo su
lsblk
file -s /dev/xvdf1
mkdir /mnt/linux_mount  #Make a mount point
mount -o ro /dev/xvdf1 /mnt/linux_mount/
ls -als /mnt/linux_mount/
Now the evidence is mounted and is ready for analysis.
VIDEO: Lab 4 Step 4 - Mount New Volume