EC2 DFIR Workshop
Lab 5: Mounting Additional Volumes
GOAL:
Attach a “BASELINE” volume for analysis of changes and a “DATA” Volume to contain the analysis artifacts
SUMMARY OF STEPS:
- Make a BASELINE Volume
- Make a new DATA Volume
- Attach & Mount the New Volumes
Step 1: Make a BASELINE Volume
Step 1a: Identify the AMI from the “Instances” view of the EC2 Console. Copy just the AMI Id.
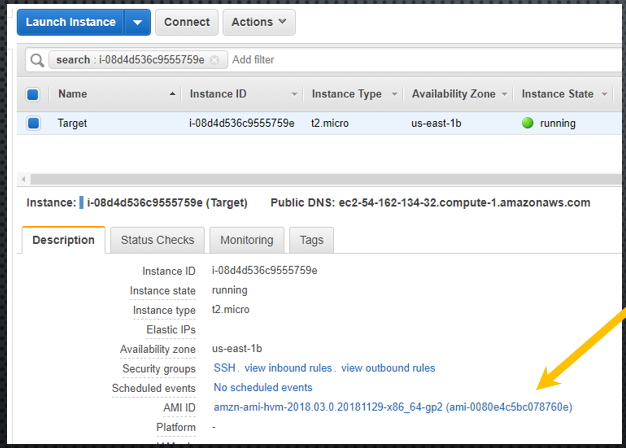 IMAGE 12: Identify and Copy the AMI-id
NOTE: If you used the shared snapshot, then use ami-0080e4c5bc078760e as the AMI
to launch to create the BASELINE Volume.
Step 1b: Click “Launch Instance” to start the EC2 Launch Wizard. Paste the AMI Id into the search Field. Then Launch the EC2 as usual, using a t2.micro type. Tag the instance with the “Name” tag set to “BASETEMP.” Use the “Proceed without a key pair” option when launching the instance.
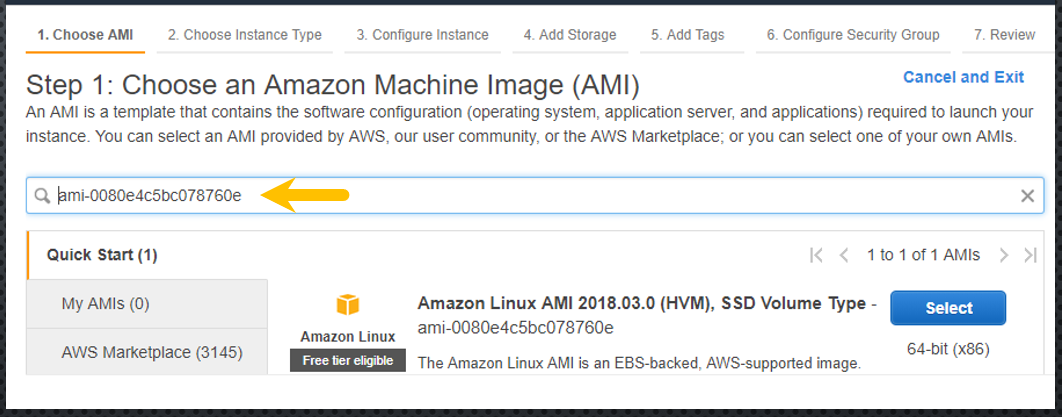 IMAGE 13: Launch an instance based on the identified AMI Id
Step 1c: Make a snapshot of the BASETEMP Volume as soon a the status checks have completed. Tag the snapshot with “Name” set to “BASELINE.”
Step 1d: Make a Volume from the Snapshot in the same availability zone as the SIFT Workstation. Tag the volume with “Name” set to “BASELINE.”
Step 1e: Terminate the BASETEMP instance as it is no longer needed.
VIDEO: Lab 5 Step 1 - Make a BASELINE Volume
Step 2: Make a new DATA Volume
Step 2a: Click the “Create Volume” button on the Volumes view of the EC2 Console.
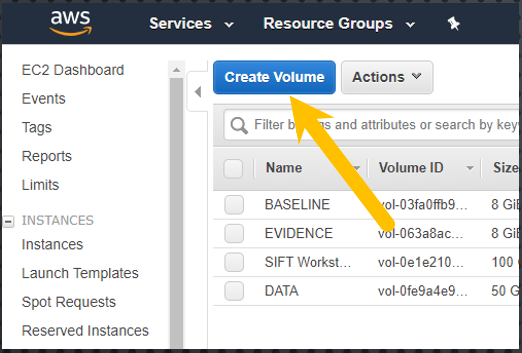
IMAGE 14: Click the “Create Volume” Button
Step 2b: Set the Size to 100 GB and select the Availability Zone to match the SIFT Workstation. Tag the volume with “Name” set to “DATA.”
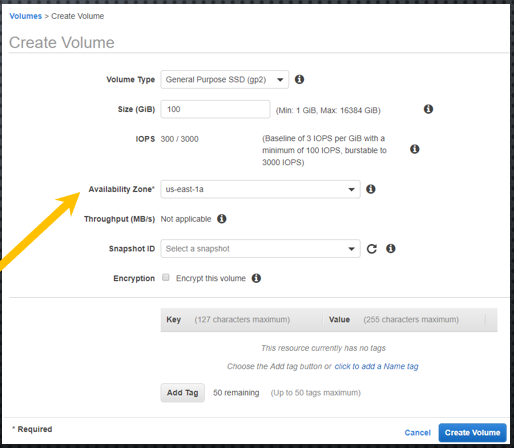
IMAGE 15: Set the Properties for the New Volume
Step 2c: Click “Create Volume”
VIDEO: Lab 5 Step 2 - Make a new DATA Volume
Step 3: Attach & Mount BASELINE Volume
Make a Mount Point:
mkdir /mnt/linux_base
Next, Use the AWS Console to attach the BASELINE volume. Attach the BASELINE volume first to avoid confusion.
Run the “lsblk” command on the SIFT to determine the device id
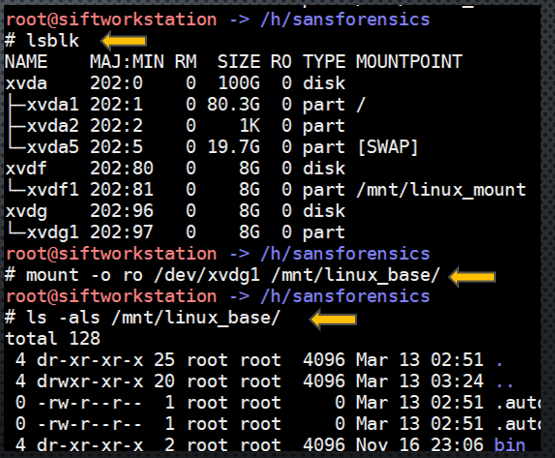
IMAGE 16: Running the lsblk, mount, and ls Commands
Mount the BASELINE Volume as Read-Only as shown in Image 16. Use:
mount -o ro /dev/xvdg1 /mnt/linux_base/
Verify it is mounted by running the “ls” command on the root of the mount point:
ls -als /mnt/linux_base/
VIDEO: Lab 5 Step 3 - Attach & Mount BASELINE Volume
Step 4: Attach & Mount the DATA Volume
Make a Mount Point:
mkdir /mnt/data
Next, Attach the DATA volume.
Run the lsblk command on the SIFT to determine the device id
Format and mount the volume:
mkfs.ext4 /dev/xvdh
mount /dev/xvdh /mnt/data
VIDEO: Lab 5 Step 4 - Attach & Mount the DATA Volume